Claude Code Tutorial: The 20-Minute Setup Most Guides Skip
Anand B · 2026-07-18
The install takes about ninety seconds:
curl -fsSL https://claude.ai/install.sh | bashThat's where most Claude Code tutorials stop, and it's exactly where outcomes start to diverge. We run dozens of Claude Code sessions a day against one monorepo, where scheduled headless jobs handle most of the routine maintenance, and the pattern is consistent: sessions that go badly are almost never a prompting problem. They're a setup problem. An agent that doesn't know your build command will guess one. An agent that doesn't know your repo's landmines will step on them. The fix is not cleverer prompting but roughly 20 minutes of configuration before the first real task. This claude code tutorial covers the whole path, install to first multi-file change, the way experienced users actually do it.
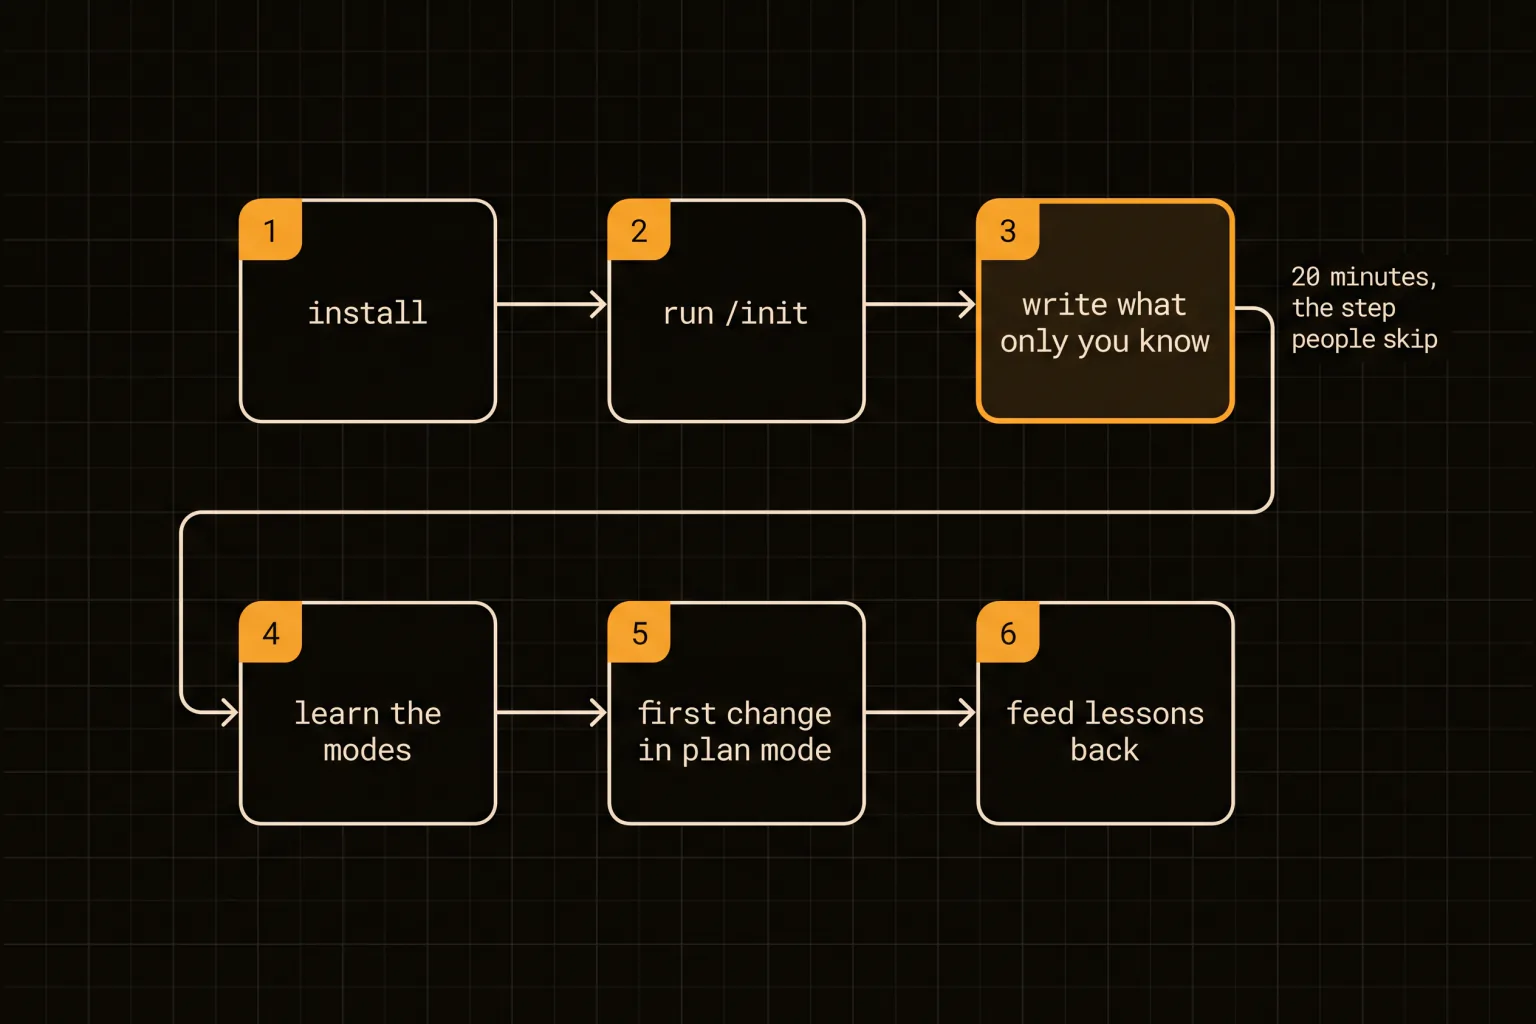
Step 1: Install the CLI and open it inside a real repo
First, the obvious part. Install Claude Code, then launch it from the root of a project you actually work on:
curl -fsSL https://claude.ai/install.sh | bash
cd your-project
claude
The native installer above is the recommended route on macOS, Linux and WSL, and it keeps itself updated in the background. On macOS you can use brew install --cask claude-code instead, and on Windows winget install Anthropic.ClaudeCode — note that neither Homebrew nor WinGet auto-updates, so you own the upgrade step there.
The terminal is one of five surfaces, and it is the one to learn first because it is the most capable: it pipes, it scripts, and everything in CI goes through it. The VS Code and JetBrains extensions, the desktop app, and the web and mobile clients all drive the same engine and share your configuration, so nothing here is wasted if you move to one of them later.
If you're new and asking what is Claude Code exactly: it's an agent that lives in your terminal. Unlike a chat window, the Claude Code CLI reads your files, runs your shell commands, edits code, and executes tests, all from the repo it's sitting in. That's why running it inside a real project matters even on day one. Pointed at an empty directory, it has nothing to work with; pointed at a codebase, it can read the architecture before writing a line.
The first run walks you through authentication. After that, typing claude in any repo drops you straight into a session.
Step 2: Run /init, then treat the output as a rough draft
Inside your first session, type:
/initClaude scans the repository and generates a starter CLAUDE.md: detected build commands, project structure, obvious conventions. Here's the part tutorials skip: CLAUDE.md is project memory. It's loaded at the start of every session, automatically, forever. Anything in it is something Claude knows before you type a word; anything not in it is something Claude has to rediscover or guess, every single session.
The /init output is a decent skeleton and a bad final product. It knows what's detectable from files. It doesn't know what's only in your head. That gap is the next step, and it's the one that actually changes outcomes.
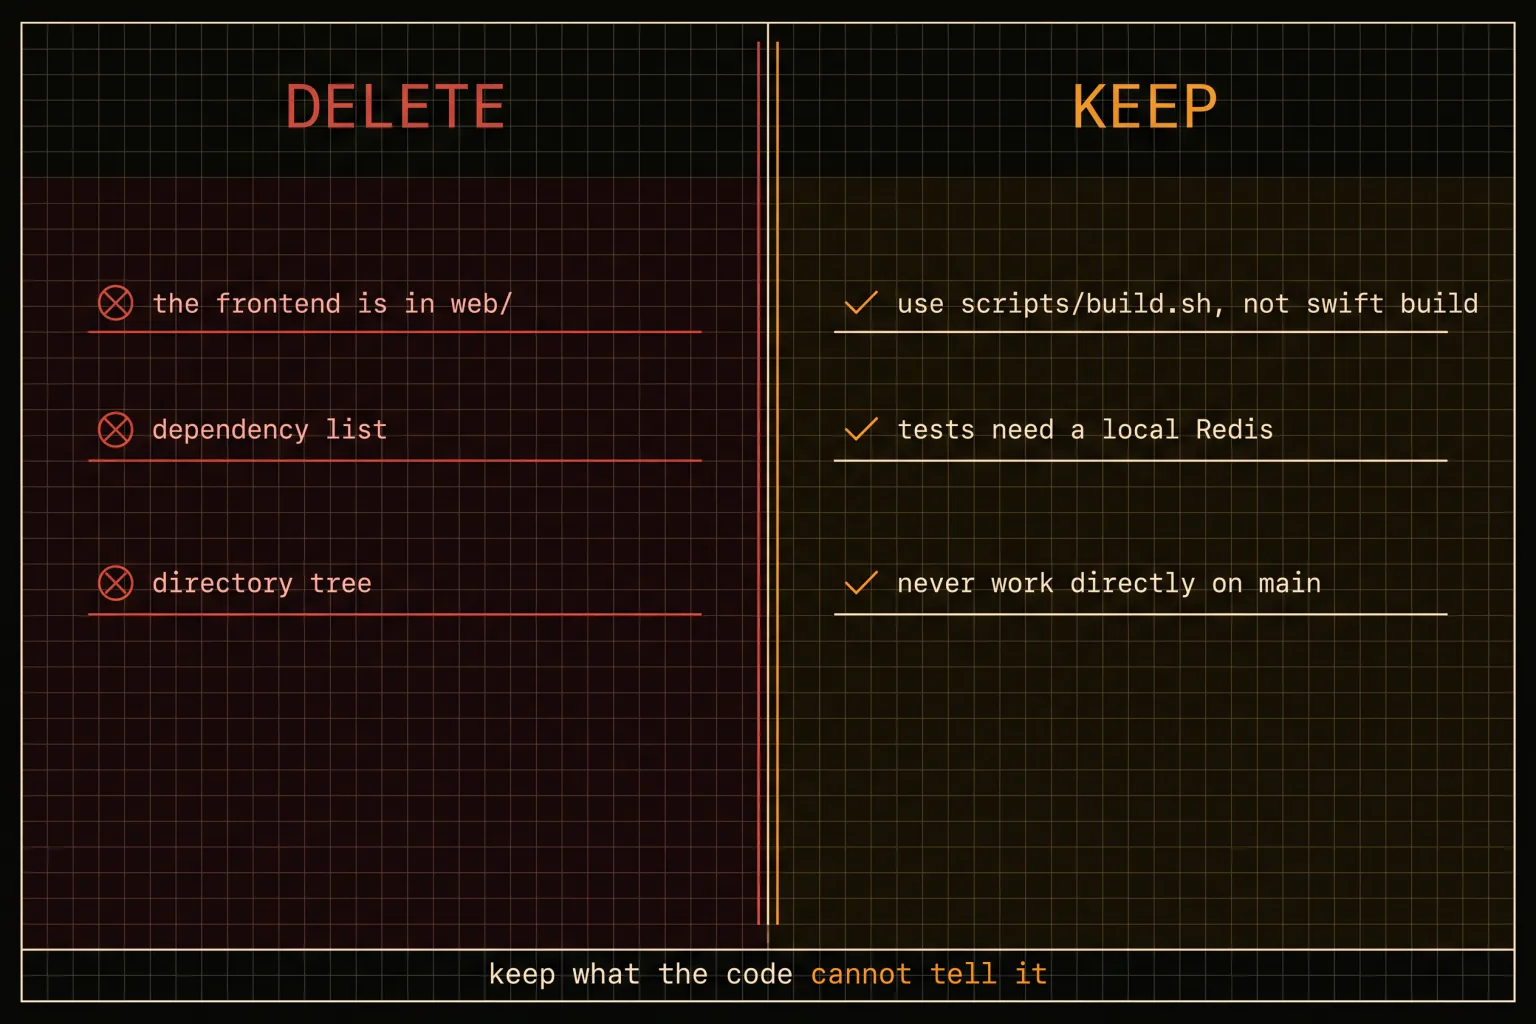
Delete aggressively before you add. Anything /init wrote that Claude could have derived by reading the repository — the directory tree, the dependency list, an architecture summary — costs you context in every future session and tells it nothing it could not find. Keep the pitfalls and the conventions that differ from tool defaults. Aim to end under 200 lines, because longer files measurably reduce how reliably instructions get followed.
If you want a second opinion on the trim, /doctor proposes cuts on a checked-in instructions file and applies roughly this rule for you.
Step 3: Spend 20 minutes writing down what only you know
Open CLAUDE.md and add the tribal knowledge. Ours includes entries like:
- "Shell is zsh: quote globs (
--include='*.ts') or they expand before the command sees them." - "Never work directly on main. This repo has a background auto-committer; branch first, commit early."
- Per-folder command tables:
swift test --filter SomeTestsfor the desktop app,npm run typecheckfor web,uv run pytestfor the API.
A concrete example of why this matters. Our web deploys only trigger on path-filtered GitHub Actions workflows: touch a file outside the filter and nothing ships. Before we wrote that down, sessions would edit a config file, report success, and the deploy would silently never happen. After one CLAUDE.md line ("changes outside the workflow's paths: list will not deploy; check the filter"), that failure mode disappeared. Not reduced. Gone.
That's the test for what belongs in the file: a good CLAUDE.md entry is a lesson you only want to teach once. Build commands, test commands, "this looks like dead code but isn't," the deploy gotcha, the naming convention nobody remembers agreeing to. Twenty minutes of this beats any amount of prompting skill, because prompting has to be repeated and setup doesn't.
Step 4: Learn the permission modes before your first real task
Shift+Tab cycles permission modes mid-session. Three of them matter on day one:
- Manual (the default): Claude asks before each file edit or risky command.
- Accept edits: Claude edits files without asking, and also runs common filesystem commands like
mkdir,mvandcp. - Plan: Claude reads and explores but touches none of your source files until you approve a plan.
There are three more you will meet later: auto, where a classifier vets each action instead of prompting you; dontAsk, which runs only pre-approved tools and is the right choice for CI; and bypassPermissions, which turns the checks off and belongs only inside a container or VM. That last one cannot be entered mid-session — it has to be enabled at launch, which is deliberate.
New users tend to stay in manual mode and click "yes" forty times in a row, which trains them to stop reading what they're approving. Experienced users match the mode to the task: plan mode for anything multi-file or unfamiliar, accept-edits for mechanical changes they'll review in the diff, manual when they want to watch a delicate operation closely. The switch is two keystrokes; use it constantly.
Step 5: Make your first multi-file change in plan mode
Now the payoff. Pick a real task that spans files: adding a field that threads through an API handler, a client call, and a test, or renaming a config key used in five places. Hit Shift+Tab until you're in plan mode, then describe the change.
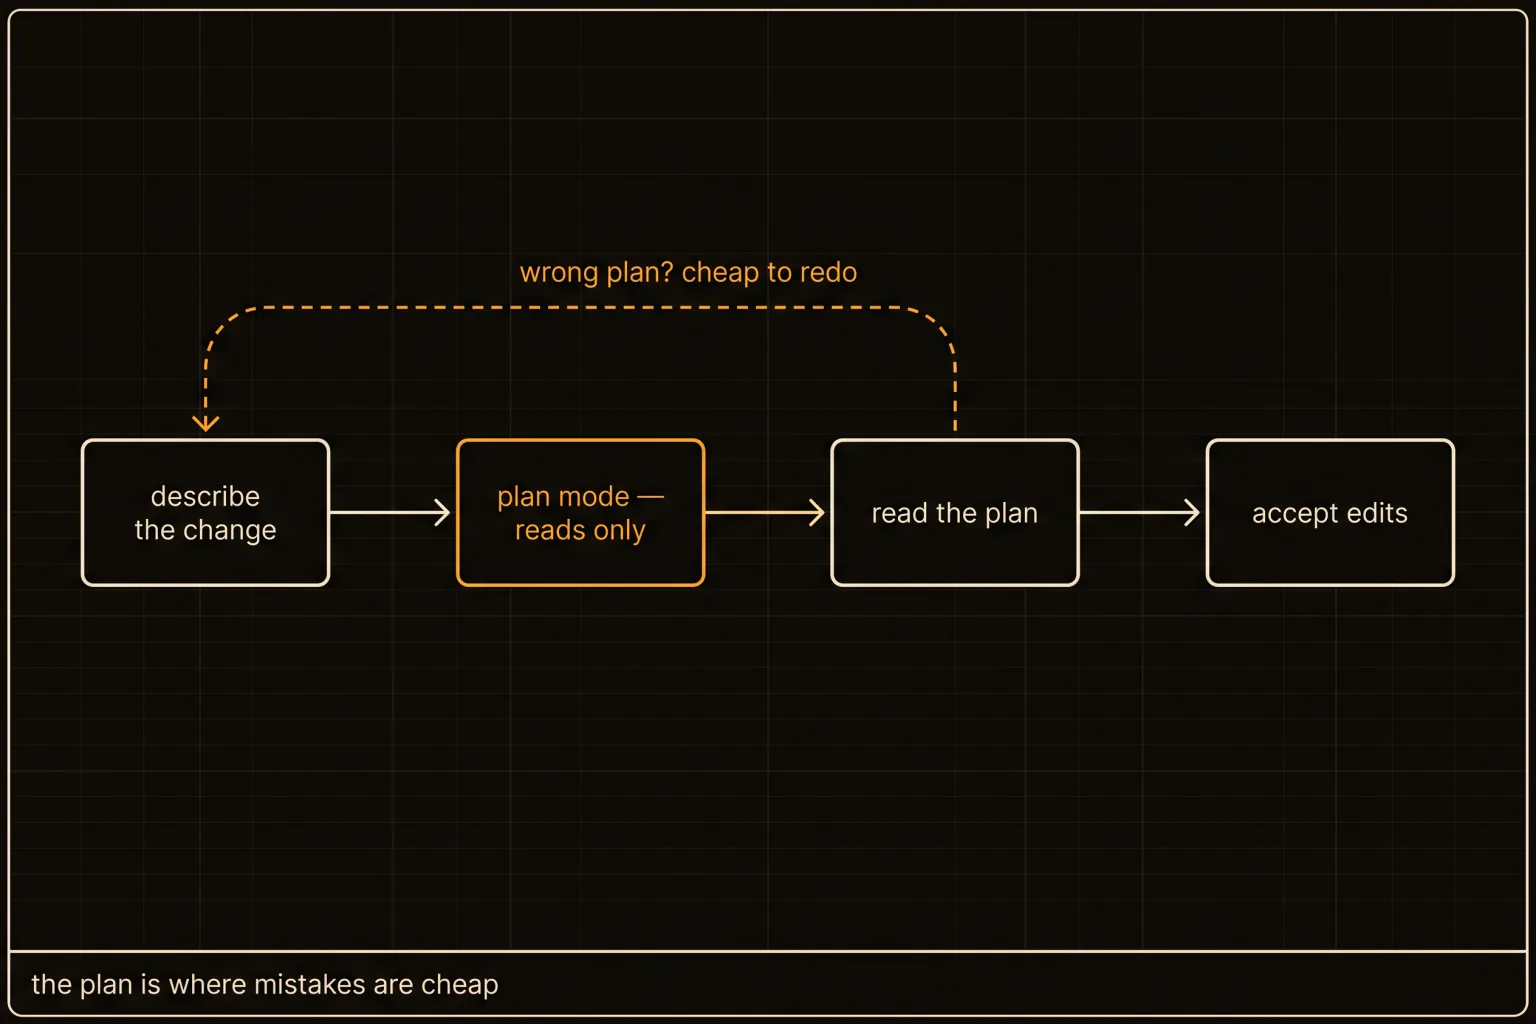
Claude explores the codebase and comes back with a proposal: which files it will touch, in what order, and how it will verify the result. This is where your CLAUDE.md work pays off visibly. Ours means the plan says "then run npm run typecheck" instead of a guessed test command, and it branches before editing because the file told it to. Read the plan like a code review, correct anything wrong, then approve and let it execute.
If you skipped step 3, this is the moment you'd notice: wrong test command, edits landing on main, a "done" that never deployed. How to use Claude Code well is mostly this loop: plan, review, approve, verify, and feed anything it got wrong back into CLAUDE.md.
Step 6: Feed lessons back, then scale past one session
Treat every friction point as a missing CLAUDE.md line and the setup compounds. Once one session runs smoothly, the same foundations extend further:
claude -p "your prompt"runs a headless one-shot session, which is how we script maintenance jobs in CI and on schedules.- Hooks run your own commands on tool events, like a formatter after every edit.
- Skills are reusable SKILL.md playbooks; MCP servers add external tools; subagents fan out searches across a large codebase.
git worktree add ../repo-task-agives each session its own working copy, so multiple Claude Code sessions can work the same repo in parallel without stepping on each other.
That last one is the bridge from an assistant to an agent team. We took it far enough to build SpeakCode, a macOS canvas where every terminal card is a Claude Code session running against its own worktree. You don't need a product for it, though; two worktrees and two terminals already change how you work. When you're ready to go deeper, we've written up the workflows that actually ship.
The order matters more than any individual trick. Install is a formality. /init is a draft. The 20 minutes you spend on CLAUDE.md and the two keystrokes of Shift+Tab before the first real task are the difference between an agent that guesses at your repo and one that knows it, and that difference shows up in your very first multi-file change.